Planning a trip to Japan? Visit Japan Web simplifies the steps required for immigration and customs declarations, allowing you to complete them online before your journey.
On this page, we’ll walk you through everything you need to know about Visit Japan Web, from a step-by-step guide to registration to assessing its benefits.
Table of Contents
- 1 What is Visit Japan Web?
- 2 How to register on Visit Japan Web as a tourist
- 3 Create an account
- 4 Register your details
- 5 Register passport information
- 6 Registering additional information & confirmation
- 7 Visa check section
- 8 Register details of any family members
- 9 Register your planned entry
- 10 Register confirmation of health and customs declaration
- 11 Generate QR codes
- 12 Useful Links
- 13 Is Visit Japan Web worth it?
What is Visit Japan Web?
Visit Japan Web is an online platform created by the Japanese government to streamline entry procedures for international visitors. Designed to simplify immigration and customs processes, the platform allows travelers to complete necessary documentation before arriving in Japan.
Accessible on both desktop and mobile devices, it replaces physical forms with digital solutions, reducing wait times and ensuring a smoother entry experience.
Key features include:
- Pre-arrival documentation: Complete your immigration and customs declarations online.
- QR code system: Generate QR codes for each declaration, which can be scanned upon arrival.
- Multilingual support: Available in several languages to accommodate international tourists.
Using Visit Japan Web is not mandatory, but it is highly recommended to expedite your entry process.
Still, if you prefer to complete the paper arrival card and customs declarations, you can ask for these from an attendant on your flight. Alternatively, they are available at the airport’s customs and arrivals halls, but filling them out here will slow down your arrival process.
How to register on Visit Japan Web as a tourist
Before you sign up, you need to make sure you have the following documents at hand:
- Air ticket
- Your passport
Note that the registration is split into 3 sections; immigration information, a customs declaration, and a tax-exemption segment.
Once you complete these different parts successfully, you’ll be provided with 3 QR codes. The first 2 are to be presented at the airport upon arrival, while the third is for use at stores offering duty-free shopping.
Although the forms may look daunting and like they will take a long time to complete, in theory it only takes around 15 minutes to fill in all your information.
Follow the steps below to register and get your Visit Japan QR codes.
Create an account
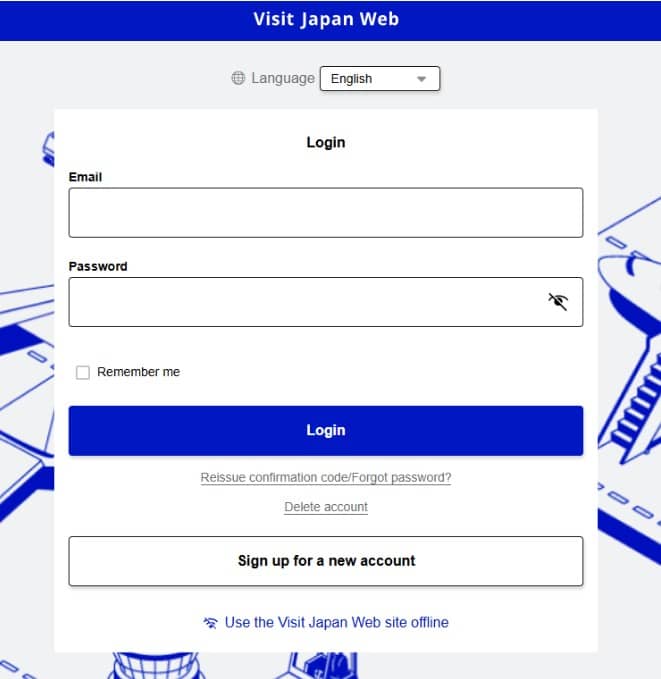
Access the Visit Japan Web official website and click on “Sign up for a new account”.

Agree to the Terms of Use and Privacy Policy.
Enter your email address, create a password, and confirm your account via the confirmation code sent to your email.
Login to your account on the Login page.
Register your details
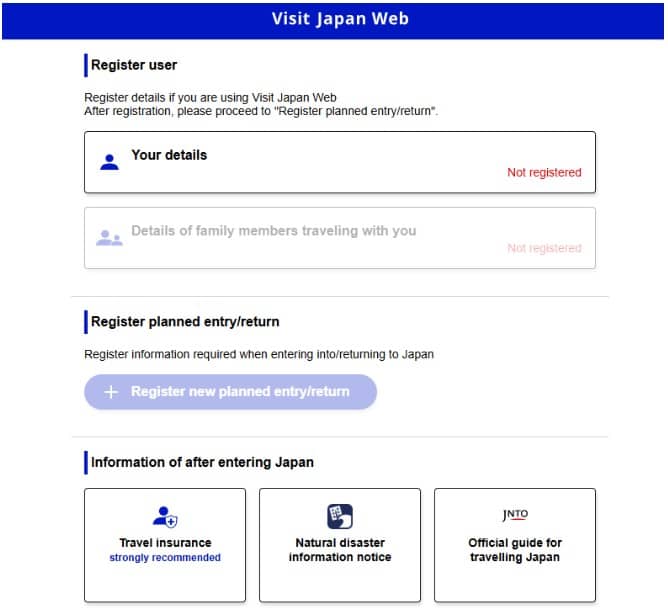
Click on the section marked ‘Your details’.

Indicate whether you have a passport issued by the Japanese government or if you live in Japan and have a special re-entry permission. If you’re registering as a tourist, you’ll want to select no for each option.
You also need to indicate whether you will use a Tax-free QR code. This allows you to make purchases in a duty-free store without having to show your passport.
Register passport information
Next, you need to provide your passport information, either by scanning your passport bio page or entering the information manually.
If you select the option to scan your passport, you’ll see instructions on how to perform the scan.
You’ll then see the area in which you should include your passport in the photo and the button to “Take photo of passport”. You need to position your passport bio page within the lines to successfully take the photo.
If the upload fails, you’ll see the following message and may need to upload the photo again in brighter light.
If you selected the option to ‘Enter information yourself’, you’ll see the form below which you need to fill in with all the details of your passport, including the following required fields:
- Passport number
- Surname
- Given name
- Nationality or citizenship
- Date of birth
- Date of expiry
Registering additional information & confirmation
Before continuing, you also have the option to input the following basic information:
- Occupation
- Home address: Country name
- Home address: City name
Registering this information now means you won’t have to enter it later on the immigration/customs declaration.
After clicking ‘Next’, you’ll see a confirmation page screen that summarizes all the details you’ve provided so far.
If everything is correct, simply click ‘Register’ to submit all your details.
If anything is incorrect or if you want to change any information, you can click ‘Back’ to return to previous pages to modify any of your data.
Visa check section
After clicking on ‘Register’ you’ll see a message prompting you to check whether or not you need a visa for Japan.
If you click on ‘Check whether or not you need to apply for a visa’, you’ll be directed to a screen that prompts you to answer if you have a visa or not.
If you click ‘Yes’, then you’ll see a message informing you that you’ll be able to copy the details from your visa application in the ‘Register Planned Entry/Return’ section of the Visit Japan Web app.
If you click ‘No’, you’ll be prompted to check whether or not you need a visa to enter Japan by visiting the official visa information page of the Ministry of Foreign Affairs of Japan.
Once you’ve decided whether or not you need a visa to visit Japan, you can click on ‘Back to Home’ to return to the ‘Register details’ page.
Register details of any family members
If you’re traveling to/from Japan with family, the next step you’ll want to take is to register the details of your family members.
You can add up to 10 family members.
For each one, you’ll need to repeat the same steps you used to register your own details. You need to add the specific passport details of each individual.
Register your planned entry
Next up, you’ll want to register your entry to Japan. You can do this by clicking on “Register new planned entry/return’ on the home page of the Visit Japan Web app.
You have the option to copy details from your visa application for Japan, or register your details manually.
On the next page, you’ll need to enter the following information:
- Planned arrival date in Japan
- Airline company name
- Flight number
- Embarkation point (optional)
You also have the option to add a ‘Trip name’ which can be useful for managing multiple trips to Japan.
On the next page, you need to enter the address of your accommodation in Japan, including the following mandatory fields:
- Prefecture
- City
- Address
- Contact phone number
You have the option to enter these details automatically by entering the postcode. If you’re staying in a hotel or hostel, you also have the option to enter the name of your place of stay.
Once you’ve completed all the required fields, click on ‘Confirm entered details’. This will lead you to a confirmation page where you can double-cjeck all the information you’ve provided so far.
If you’re satisfied all the information is correct, click ‘Register plan’ to submit your details.
Register confirmation of health and customs declaration
After you’ve registered your travel plans, you’ll find you can access and edit the entry on the home page of the Visit Japan Web app.
If you click on this entry, you’ll be directed to a page where you can complete health and customs declarations.
On the page for the Confirmation of Health Condition, you’ll be prompted to answer whether you’re experiencing any symptoms of ill health, and receive a message of advice from the Ministry of Health, Labour and Welfare.
After clicking on the ‘Immigration clearance and customs declaration’ tab, you’ll be prompted to confirm your previously entered basic information or enter it if you have not done so already. You’ll then be asked to provide information about your trip to Japan, including:
- Purpose of visit
- Duration of stay (in years, days, or months)
You then need to answer the following questions to proceed:
After answering these customs questions, you’ll then be directed to a confirmation page where you can double-check and confirm all your details.
After double-checking everything is correct, click on ‘Register’ to submit your details.
If you feel like you need extra guidance on completing the forms, you can reference the detailed manual on completing Visit Japan Web or access the ‘How to Use’ section on the Homepage.
Generate QR codes
Once all forms are completed, a QR codes will be generated for each declaration. You can view these at any point by clicking on the ‘Display QR code’ button in your travel plan.
Save these QR codes to your phone for use at immigration and customs checkpoints. You may want to consider taking a screenshot of the QR code so you don’t need to rely on an internet connection to access it.
Useful Links
The homepage of the Visit Japan Web app also has several links to sites that you may find useful for your trip to Japan:
Is Visit Japan Web worth it?
Using Visit Japan Web is highly beneficial for most travelers. Here’s why:
Pros:
- Time-saving: Complete forms before your trip and avoid delays at the airport.
- Convenience: Everything is handled online, eliminating the need for paper forms.
- Streamlined process: QR codes speed up immigration and and customs checks.
Cons:
- Technology dependency: Requires a stable internet connection to register and access QR codes.
- Learning curve: Some users may find the registration process challenging, especially if they’re unfamiliar with online platforms.
Overall, the advantages outweigh the drawbacks, making it a worthwhile tool for a hassle-free entry into Japan.
